Are you wanting to add some flavour and colour to your modelling chocolate? Well you are in the right place.
Why You Should Be Using Modelling Chocolate Instead Of Fondant
Is it just me, or do you find fondant a bit sickly? It just tastes of sugar. Like a thin piece of soft sugar in your mouth. I try not to use it as much as possible. But what about fondant figures and
covering your cakes? You ask.
Don’t worry, I use modelling chocolate, but not your standard white, milk or dark chocolate.I have the recipe for the best modelling chocolate EVER!
Do you know why?
Because it’s flavoured with what ever flavour you like.
YAY!
This is ggmix after all, and here it’s all about the FLAVOUR! and that’s why I flavour and colour my modelling chocolate.
Flavour & Colour Modelling Chocolate
I’ve gone that 1 step further and taken your standard modelling chocolate and created the grandest of all modelling chocolates, the king if you like, FLAVOURED MODELLING CHOCOLATE, that can also be coloured with whatever colour you like.
How To Flavour & Colour Modelling Chocolate
Now come on, this is the grandest of the grand, the pièce de résistance, and the best bit is that there are only 4 ingredients:
- White Chocolate
- Golden Syrup
- Extract of your choice for flavouring, the better the quality the less you have to add and the stronger the flavour will be
- Food gel colour
Then all it is, is mixing everything together, leaving it over night to set and there you have some lovely, tasty, mouldable chocolate.
How to make flavoured and coloured modelling chocolate video
Ingredients
- 250 g white chocolate
- 100 g golden syrup
- splash good quality extract - the flavour is your choice
- food gel colour of choice
Instructions
- Heat chocolate in the microwave or over a double boiler until it is melted
- Heat golden syrup for 20 seconds in the microwave or in a pan to make it more runny
- Add a splash of your chosen extract to the golden syrup
- Add your flavoured golden syrup to your melted chocolate
- Stir it all together with big sweeping motions until most of the golden syrup is combined but you can see a few golden syrup streak still running through. (This is the most important step because if you over mix your chocolate it'll end up being too hard and impossible to work with).
- Lay out some Cling film and pour out your chocolate. Spread it out flat and seal tightly in the Cling film
- Leave to set over night
- The next day your chocolate should be rock hard, break as much as you need off and start kneading to get it soft and pliable
- To test if you have kneaded enough, roll it out with a fondant rolling pin (a wooden one will make the chocolate stick) if the sides have any cracks on the edges you need to knead some more and test again. Your chocolate is workable, when you roll it out and all the edges are silky smooth.
- If you want to keep your chocolate its original colour then stop here and mould it into whatever you like. But if you want to change the colour roll out your chocolate add your chosen food gel colour to the middle and knead until all the colour has been evenly distributed. Remember to start of with a little bit of colour and add more as you go because if you add too much and it ends up being too dark you can't lighten it.
- Once you have the shade you like you can get to modelling (",)
VIDEO
ggmix TIPS
'Chocolate is too hard and breaking' If you find your chocolate is too hard and just keeps breaking into pieces when you try to knead it, put it in the microwave for 10 seconds and it'll be perfect to work with. MODELING CHOCOLATE PROBLEM NUMBER 2:
'Chocolate is too sticky and greasy' You have heated the chocolate up with your hands, don't worry just put your chocolate in the fridge for a few minutes to harden and it'll be back to it's best in no time.
Nutrition
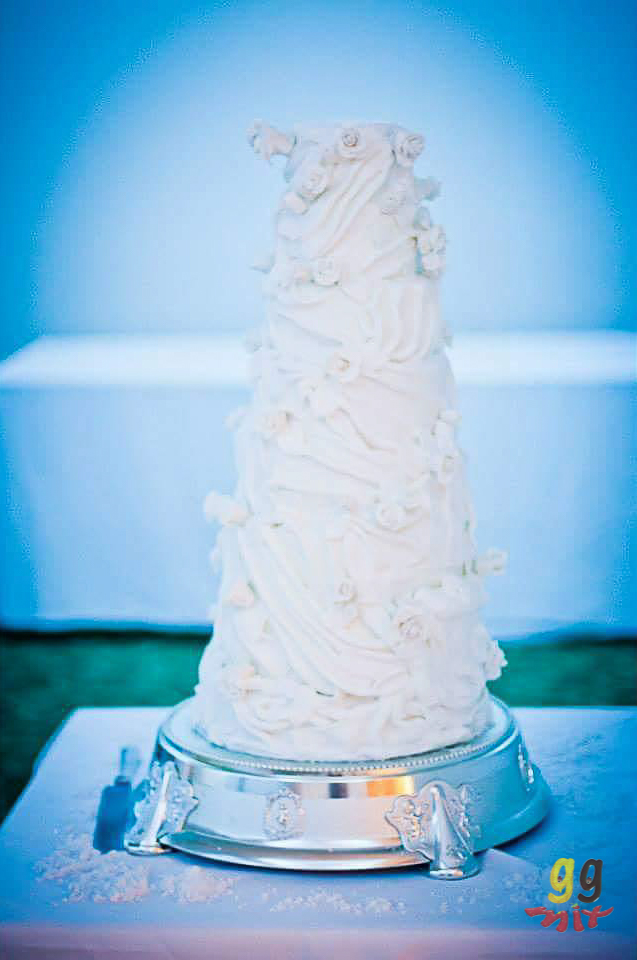
The picture of the cake above is of my wedding cake. I made it all my self and it was pretty easy. Don’t let the 8 tiers and abundance of roses fool you. It was time consuming but not hard at all. You can see how I made my roses by clicking here
Leave a Reply